
My Problem
Trying to get Camtasia 9.1 Library Assets to Camtasia 2018 on the Macintosh I hit some tough speed bumps! I couldn’t directly go from Camtasia 9.1 to Camtasia 2018 Mac! My hope is that I can help you avoid the frustration I had trying to do this!
Background
It was so great to see the addition of a Library feature as part of the latest upgrade to Camtasia 3 to Camtasia 2018 Macintosh.
I have been producing explainer videos on my Windows 10 PC as well as my Macintosh OS High Sierra version 10.13.6 for quite some time. I go back and forth between the two operating systems with ease frequently.
In Camtasia 9.1 on Windows I created Library Assets that took a bit of effort and time. If I could get those same Library Assets into my Camtasia 2018 Macintosh, then I could use them across all of my Camtasia 2018 Mac projects. That way I could be more efficient in my Mac Camtasia projects. And wouldn’t have to recreate these Library assets on the Macintosh! I saved time in Camtasia 9.1 by using these Library Assets in many of my Camtasia projects there.
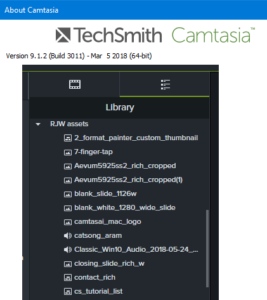
I did understand that in the upgrades to Camtasia 2018 Mac and Camtasia 2018 Windows, I can share Library assets between these two apps and operating systems.
And I learned that I can import Camtasia 9.1 Library Assets into Camtasia 2018 Windows.
In addition, I found out that Camtasia 2018 Windows Library Assets are not backward compatible to Camtasia 9.1.
There is a Camtasia 2018 Windows Library command Library -> User Libraries -> Camtasia 9.1 (Needs upgrade)… That command is designed so that your entire Camtasia 9.1 Library is imported into your Camtasia 2018 Windows Library.
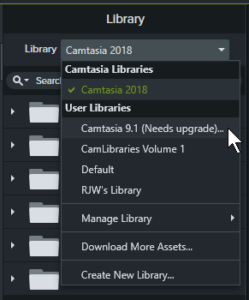
But when I tried that it didn’t work! Camtasia 2018 Windows couldn’t upgrade my Camtasia 9.1 Library and wasn’t able to import it!
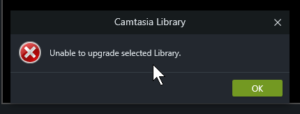
I submitted a ticket to the wonderfully helpful (I mean that!) TechSmith support. They think it might be the size of my Camtasia 9.1 Library. They are working on solving the technical stuff. And I worked out a way to do it without wholesale importing of my Library Assets!
How to get my Camtasia 9.1 Library Assets to Camtasia 2018 on the Macintosh? Yes, I figured it out.
My Assumptions About Your Setup
First, I have made some assumptions about your setup. This is my setup!
- You have Camtasia 9.1 installed on your Windows PC. (I’m using Windows 10)
- You know what a Library Asset is and have created them in Camtasia 9.1.
- You have Camtasia 2018 Macintosh installed on your Macintosh.
- You know how to copy files between your Windows PC and your Macintosh
TechSmith Camtasia Library Assets
The Camtasia Library is like a media bin that is shared across all your projects. Any media that you add to the Library is stored locally and is readily available in any Camtasia project on your computer.
I use this feature all the time! And, now I’m thrilled that this feature is in Camtasia 2018 Mac. Opens up new possibilities.
When you export a Library Asset, Camtasia creates a Library Zip File. The files extension is *.libzip, a special kind of Zip file.
When you put a Library Asset from your Library to your Timeline, you can edit the media in any way you like. The Library Asset in your Library isn’t affected.
My Workaround Process Summary
Instead of directly from Camtasia 9.1 to Camtasia 2018 Mac, I added an intermediate step!
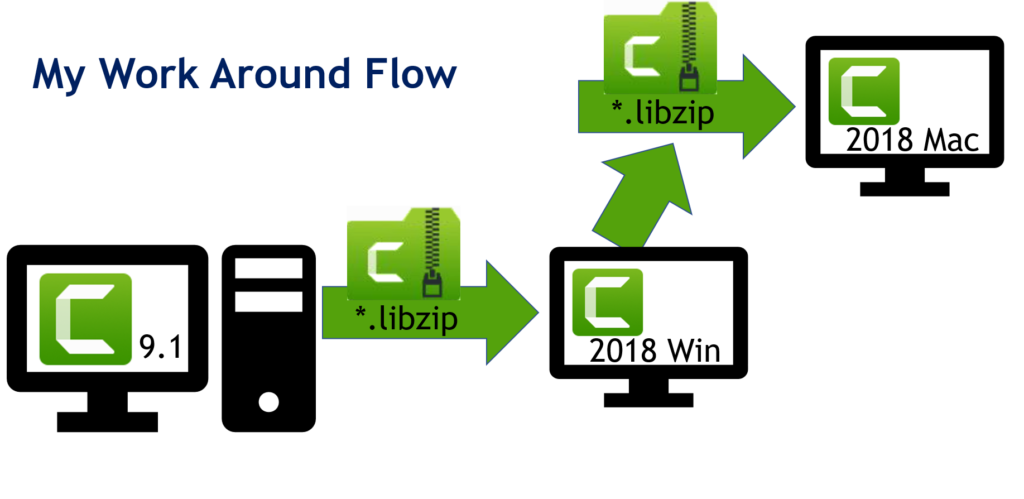
It goes like this!
- Export specific Library Assets from Camtasia 9.1.
- Import those Library Assets’ Library Zip File into Camtasia 2018 Windows.
- Select and export those specific Library Assets from Camtasia 2018 Windows.
- Copy the exported Library Assets’ Library Zip File from Step C. above onto your Macintosh.
- Import those Library Assets’ Library Zip File into Camtasia 2018 Macintosh.
- Success!
That seems like a lot of work, but it really moves very fast, once you get the hang of it! I’ve done all the hard work for you!
Now for the Detailed How-To Steps!
-
Step: A. Export specific Library Assets from Camtasia 9.1.
- In Camtasia 9.1, click or select the Library Asset you want to get into Camtasia 2018 Macintosh. You can shift click, or Ctrl-click to select multiple Library Assets.
~ If you want only one specific Library Asset, you can Right-click it. - Go to File -> Library -> Export Selected Assets -> Export Library As Zip ->
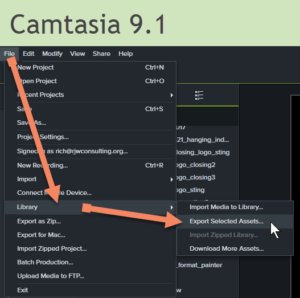
~ Click the Folder icon to change to a different folder to save the Export.
- In Camtasia 9.1, click or select the Library Asset you want to get into Camtasia 2018 Macintosh. You can shift click, or Ctrl-click to select multiple Library Assets.
-
Step B: Import those Library Assets’ Library Zip File into Camtasia 2018 Windows.
- In Camtasia 2018 Windows, Right-click in any Library except “Camtasia 2018 Library.”
- Select Import Zipped Library, Navigate to the folder where you saved the Library Zip File (*.libzip).
- Select (click) the *.libzip you want to import.
- Click Open, and the Zipped Library is unzipped into your Camtasia 2018 Windows Library.
- Alternatively, You can go to File -> Library -> Import Zip Library, Navigate to the folder where you saved the Library Zip File (*.libzip).
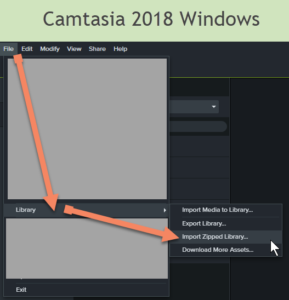
~ Select the *.libzip you want to import.
~ Click Open.
~ On the Import to Library dialog box, in the Add to: drop-down menu, select the Library where you want this Zipped Library.
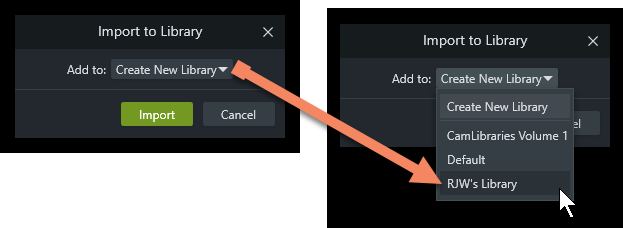
~ Click Import.
~ The Zipped Library is unzipped into your selected Camtasia 2018 Windows Library.
-
Step C: Select and export those specific Library Assets from Camtasia 2018 Windows.
- In Camtasia 2018 Windows, navigate to the Library where the Asset resides.
- Select the Library Asset.
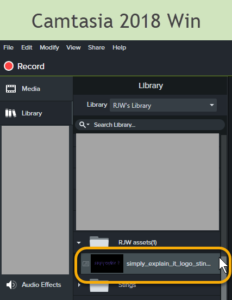
- Go to File -> Library -> Export Asset.
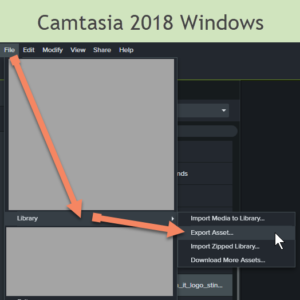
- Click Save to save the Library Zip File (*.libzip).into the folder where you navigated to.

~ Alternatively, in the Library where your asset resides, you can Right-click on the Asset, choose Export Asset.
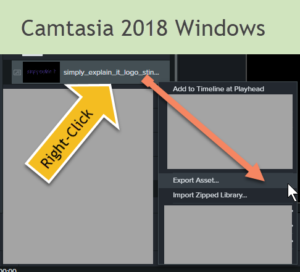
~ Click Save to save the Library Zip File (*.libzip) into the folder where you navigated to.
-
Step D. Copy the exported Library Assets’ Library Zip File from Step C. above onto your Macintosh.
~ I am assuming you know how to do this step! (Let me know, and I certainly would be happy to help you.)
-
Step E. Import those Library Assets’ Library Zip File into Camtasia 2018 Macintosh.
- In your Macintosh Finder, open the folder where you copied your Library Zip File (*.libzip).
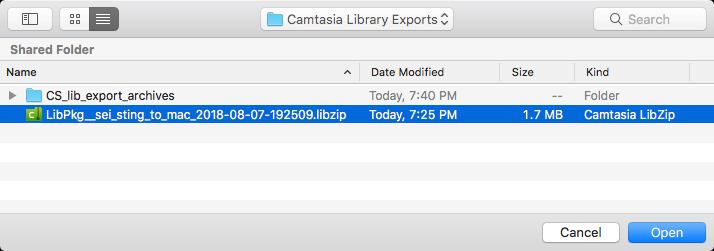
- Double-click the Library Zip File (*.libzip).
- If your Camtasia 2018 Macintosh is not running, it will launch.
- You’ll be presented with the Import Library dialog box.
- From the Add to: drop down menu select the Library you want the asset to be in.
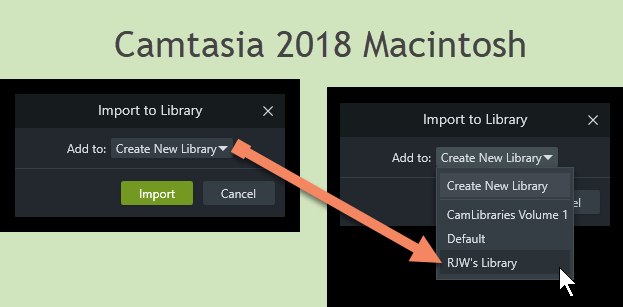
- Click Import!
- The Zipped Library is unzipped into your selected Camtasia 2018 Macintosh Library.
~ Alternatively, when Camtasia 2018 Macintosh is running, Right-click in any Library except the “Camtasia 2018 Library” where you want the Library Asset, choose Import Zipped Library.
~ Navigate to the folder and select the desired *.libzip.
~ Click Open
~ You’ll see the Import Library dialog box.
~ From the Add to: drop down menu select the Library you want the asset to be in.
~ Click Import!
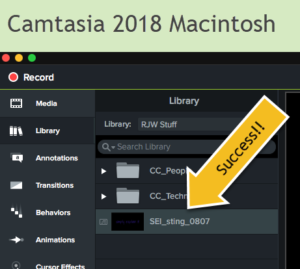
- In your Macintosh Finder, open the folder where you copied your Library Zip File (*.libzip).
Congratulations! Wonderful!
Now you have in your Camtasia 2018 Macintosh Library that Camtasia 9.1 Library Asset that you worked so hard on! And now it’s available to you in all your Camtasia 2018 Macintosh projects! See, it really wasn’t that hard, was it?
I wrote about sharing Camtasia 2018 projects in my blog post here!
Incompatibilities between Camtasia 2018 Macintosh, Camtasia 2018 Windows and Camtasia 9.1
Camtasia 2018 Windows Library Assets are not backward compatible to Camtasia 9.1.
Camtasia 9.1 Library Assets that include the following media are not compatible with Camtasia 2018 Macintosh. That means that the Camtasia 9.1 Library Assets could successfully import into your Camtasia 2018 Macintosh using my work flow above, the media listed below will simply not be in that imported Library asset.
- Camtasia Recording Files
- CAMREC
- Video Files
- AVI, WMV, SWF, MTS
- Audio Files
- WMA
- Callouts
- Any Camtasia Studio Legacy Callouts
My Blog Vision
I know I’m late to blogging! Duh! Since this is my first blog post on Simply Explain It, I thought I would tell you why I’m diving into this fun!
My vision is to help you folks who are learning and using TechSmith’s Camtasia on the Mac and Windows to advance your skills. I’ve been producing videos with Camtasia and Snagit since 2008. I’ve been comfortable working back and forth between these platforms. And I’ve been helping folks learn how to be more and more productive on the Macintosh and Windows since before 1998.
I’ve met many lovely creators along the way and I thought I would burst on the web now! I hope to meet you soon, too.
I’m eager to hear what you might be struggling with producing your videos with Camtasia or any other apps. Let’s see what we can learn together!
Thank you so much for reading through to here! I do so appreciate you.
What Software/Apps I used to Write This Blog
- TechSmith Camtasia 9.1.2
- Camtasia 2018 Macintosh v2018.0.1
- Camtasia 2018 Windows v2018.0.1
- Camtasia Snagit Windows 13.1.6
- Camtasia Snagit Macintosh 13.1.6
- Microsoft PowerPoint 2016
- Microsoft Word 2016
Trademarks
Camtasia, Camtasia Studio, Jing, Screencast, Screencast.com, Snagit, TechSmith, TechSmith AppShow, TechSmith Fuse, TechSmith Screencast, TechSmith Smart Player, and TSCC are either registered marks or marks of TechSmith Corporation in the U.S. and/or other countries. This list is not a comprehensive list of all TechSmith Corporation marks. The absence of a name/mark or logo in this notice does not constitute a waiver of any intellectual property rights that TechSmith Corporation has established in any of its product, feature or service names/marks or logos. All other marks are the property of their respective owners.
This is my First Blog Post!
2 thoughts on “How to Copy TechSmith Camtasia Library Assets from Windows to Macintosh”
This worked like a charm. The TechSmith website
https://support.techsmith.com/hc/en-us/articles/360023974831-Find-and-Organize-Assets
failed to give information heping woth my problem of moving Camtasia library assets from PC (Camtasia 9) to Mac (Camtasia 2019). This solved my problem. The downside is that you have to have the same version of Camtasia on both computers (or possibly just Camtasia 2018 or later). TechSmith needs to make updates to their documentation and then make it so you don’t have to do this run around.
G’Day Glen and Thanks for stopping by!
When I posted this, I had Camtasia 2018 on my Mac and on my Windows 10 PC. Camtasia 2019 had not yet been released.
Camtasia 2018 Mac was the first that the Mac Camtasia introduced Libraries! I am so delighted! Now I can share Libraries between My Mac’s and my Windows 10 PCs. A real productivity improvement for me!
Please note that when I encountered this problem; and found this work-around, Camtasia 2018 Windows wasn’t able to “grab” my Libraries assets from my Camtasia 9.1 Windows 10. Since then, TechSmith has corrected this problem.!
I am grateful for your interest and your comment!
Are you producing videos on both Windows PCs and Mac’s in Camtasia? Any other help I could write about for you? I’m always open and eager to help my readers.
Cheers,
Rich